At one of my customers we stated in the security policy that all of our virtual machines, running in Azure, needed to comply to the security benchmark according to the Center for Internet Security aka CIS benchmark. The CIS benchmarks are a community driven nonprofit organization and are globally recognized for delivering best practices for securing IT systems and data. Virtual machine/Operating System hardening involves the process of improving the security of a default installation to minimize the attack surface.
Although it can be setup manually on each machine, there are multiple automated ways of applying the CIS settings to machines, like Group Policy’s, CIS hardened images from a cloud marketplace, Configuration Management tools like Ansible or Puppet and many more. Doing this with a automated setup is preferred to prevent inconsistent security configurations because of human error and it also prevents configuration drift, so all your machines will be configured the same.
In this blog we are focusing on Azure Desired State Configuration. My specific choice for configuration management at this particular client. The machines, that needed to receive the hardening settings, were all Windows Server 2019 virtual machines. Azure Desired State Configuration uses Powershell DSC and is natively supported on Windows Server 2019 in Azure but it can also be used on older versions of Windows and also on virtual machines running on-premises.
CIS Benchmark Group Policy
First we will need to convert the CIS benchmark from a group policy datatype to Powershell DSC. You can download the needed CIS benchmark in Group Policy format from the CIS website. From there on we can use the Powershell function “ConvertFrom-GPO” to convert the Group Policy’s to a Powershell script. Do no convert them to a .MOF file because we need to edit the Powershell script to our likings. I would like to advice to insert this script in your GIT code repository.![]()
Microsoft documentation on this part
LINK
There are more than 300 settings defined in the Windows Server 2019 CIS benchmark and we did a full walkthrough with our security team to determine if we comply with the standard CIS setting or that we do a adjustment. Not all default settings will work for your environment. Also I would advice to test these settings in a test environment because the risk of locking yourself out is significant. It happened to use a couple of times. I would also like to advice to implement this starting at 1 workload. The easiest would be a greenfield situation with no application landscape, but if you are implementing in a existing environment with a lot of applications, make baby steps and be on standby to respond to failing applications and adjust from there. This whole process takes a lot of time from multiple teams and departments but once finished it is easily applied through your whole environment making it way more secure.
Powershell DSC
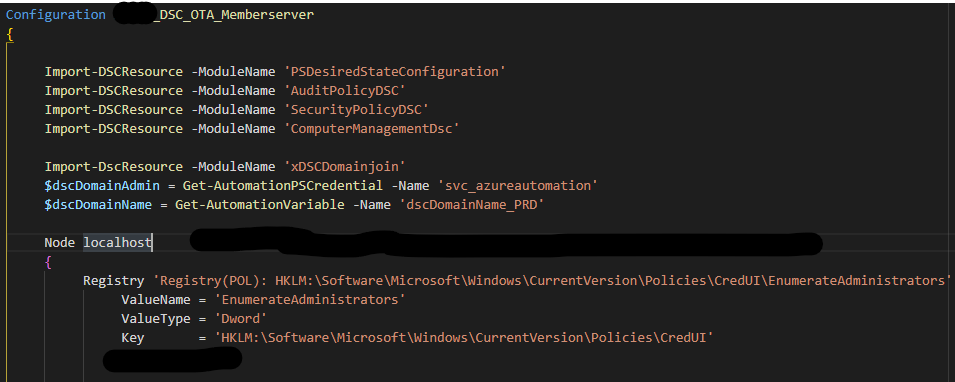
Above screenshot is the Powershell DSC script. It consists mainly of registry settings. In the example above I also included an extra Powershell DSC module for domain joining my virtual machines during deployment in Azure.
Azure Automation Account
When you are finished with editing the Powershell DSC individual settings to your likings, or better to say, to be compliant with the company security standard, you are ready to deploy them to the virtual machines. And to do that, we will need a Azure Automation Account.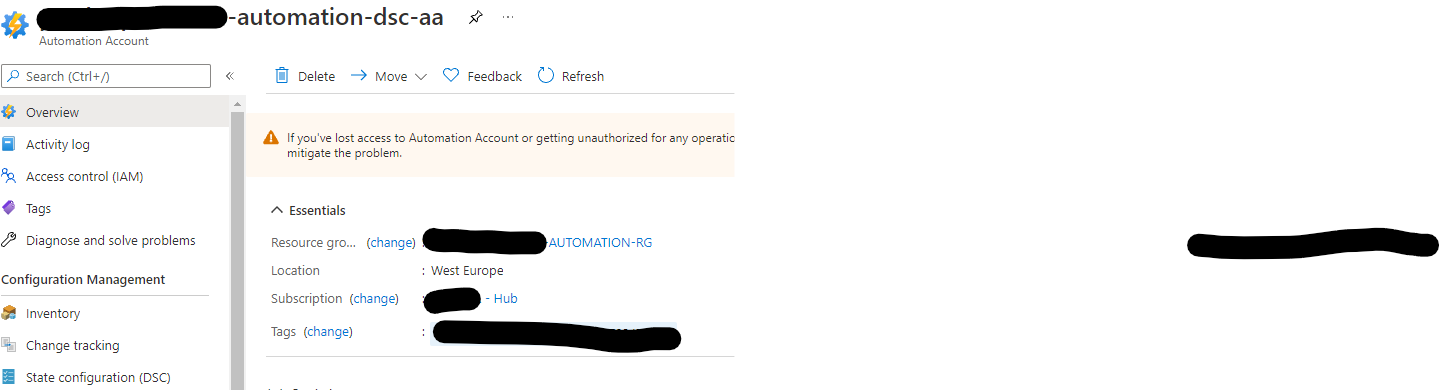
As you can see in the Powershell DSC script, there a several module used:
Import-DSCResource -ModuleName ‘PSDesiredStateConfiguration’
Import-DSCResource -ModuleName ‘AuditPolicyDSC’
Import-DSCResource -ModuleName ‘SecurityPolicyDSC’
Import-DSCResource -ModuleName ‘ComputerManagementDsc’
Import-DscResource -ModuleName ‘xDSCDomainjoin’
These modules need to be installed within the Modules section of the Automation Account.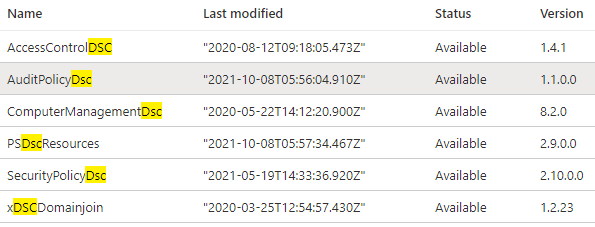
Because I also have a domain join section in the Powershell DSC script, I have setup a variable within the Automation Account that tells the domain name and also a credential for the account that has sufficient rights for domain joining a machine.
Snippet of the DSC piece doing the domain join.
xDSCDomainjoin JoinDomain {
Domain = $dscDomainName
Credential = $dscDomainAdmin
JoinOU = “OU=xxx,OU=xxx,OU=Servers,DC=xxx,DC=LOCAL” }
When configured all correctly, you can import a configuration to Azure DSC. After importing it needs to be compiled. This can all be done through the Azure portal or through Powershell.
Import-AzAutomationDscConfiguration -SourcePath xxx -Published -ResourceGroupName xxx -automationaccountname xxx
Start-AzAutomationDscCompilationJob -ResourceGroupName xxx -ConfigurationName xxx -AutomationAccountName xxx
Azure DSC enrollment
Where it is possible to manually add a virtual machine to a Automation Account DSC configuration, I have automated that part during the initial deployment of our virtual machines through ARM templates. It simply uses the Powershell DSC extension which holds the information of the Automation Account and specific nodeconfiguration to use.
Above you can see a small snippet of the ARM template I’m using. Settings you can’t see in the screenshot but are there are properties like the RegistrationURL of the Automation Account, NodeconfigurationName and ConfigurationMode. I’m using Apply and Autocurrect so when anyone alters a setting within the virtual machine, it’s automatically returns to the setting from the DSC within 15 minutes. This prohibits configuration drift.
When a virtual machine is deployed through ARM it automatically gets registered to Azure DSC and we get a nice single pane of glass for all our virtual machines and their compliancy.
I have also setup an alert through log analytics which notifies me when a virtual machine is not compliant. I have got 9 unresponsive machines at the moment because these are turned off to save costs. Some users or teams can start their own virtual machines and are automatically shutdown at specific hours. Maybe more on this in another blog!
Azure pipeline
Even though when the parts above are implemented saves a lot of time configuring machines, the maintenance of different desired state configurations became a burden to me. Especially the uploading and importing of the scripts and then compiling. So for this part I found use of an Azure Pipeline to automate these tasks. As said above I advised to put the Powershell DSC scripts in a GIT repository for version control, but this also enables me to trigger a release pipeline within Azure DevOps whenever a configuration gets adjusted. 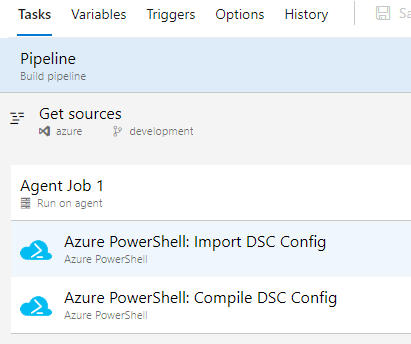
It’s a simple 2 task pipeline which mainly uses the the “Import-AzAutomationDscConfiguration” and “Start-AzAutomationDscCompilationJob” powershell commandlets. I have one piece that was a bit more complex for and that was the actual trigger of the pipeline. I wanted to have a continuous integration pipeline, so whenever I did a commit in my repository, this pipeline would trigger. But I did not wanted this to re-import and compile all of my different desired state configurations. This happened because I have all my desired state configurations in one folder within the repository. I only wanted to handle the very specific script I had just edited. Therefore I’m using the line below within the first Agent task.
$changes = git diff –name-only –relative –diff-filter AMR HEAD^ HEAD .
This uses a GIT command to check which file has actually changed and and put that in a variable.
Conclusion
I hope this blog gives you some information of how you can setup a desired state for your virtual machines, make them more secure and prevent configuration drift on your environment! Also big thanks to my colleague Masoud Samadi for helping me with this project.